Installation Guide Inside Explorer Exhibition Viewer
Step-by-step guide
1. Install the Inside Explorer Exhibition Viewer (right-click or double-click the MSIX-file – then install or reinstall).
2. Open the content-folder and install the MSIX-file. If you have multiple exhibits, do this step for each content folder.
3. Now go ahead and start the Inside Explorer Exhibition Viewer (located in Apps & features)
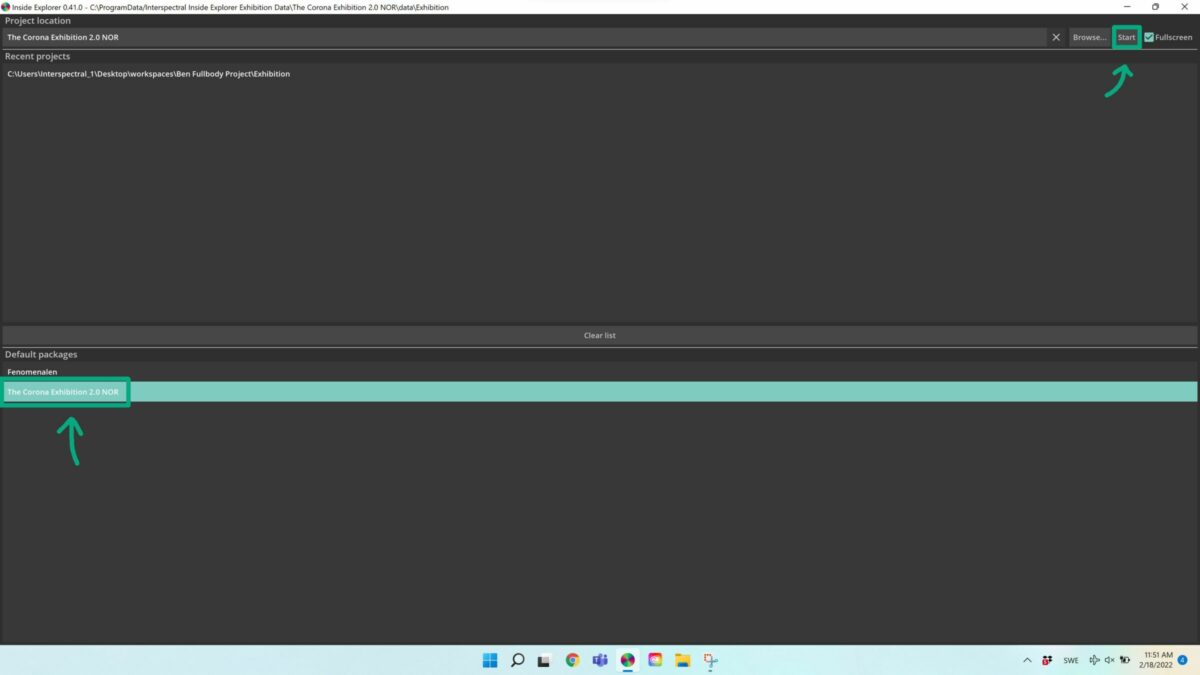
4. Choose your Exhibition under Default packages and click Start
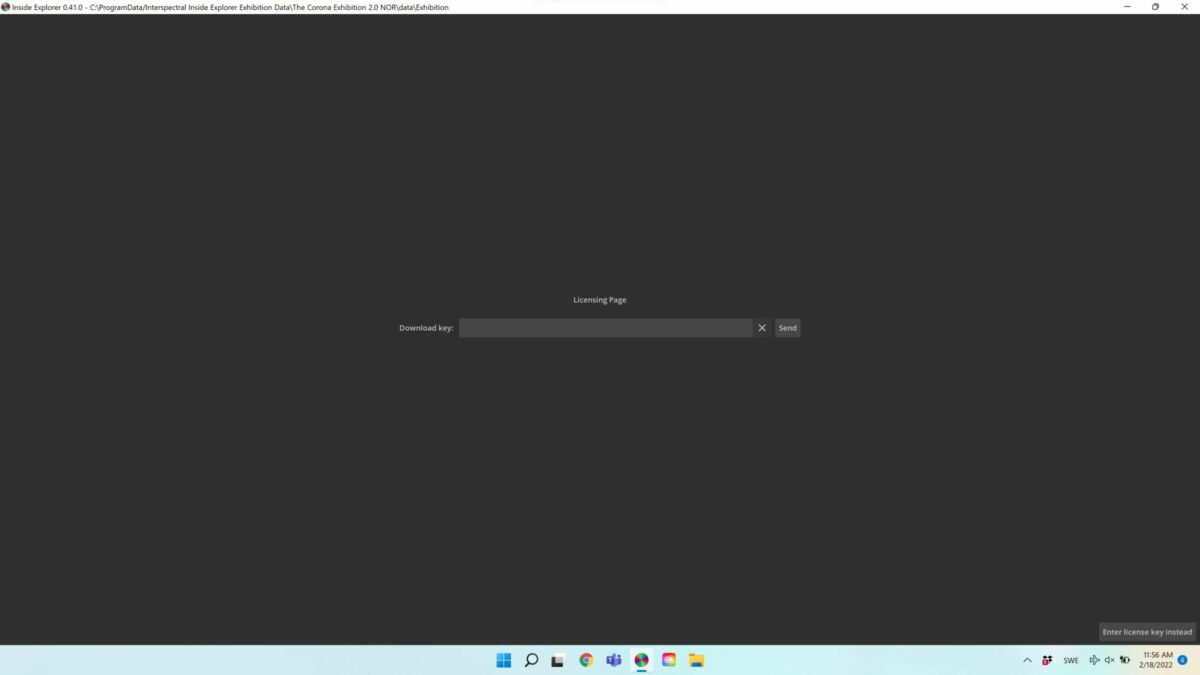
5. Enter the unique Download Key provided to you by our team. Remember that your computer needs to be connected to the internet when you paste in the download key and license the exhibit.
Multiple exhibits to license? Close the software – open it again. Redo steps 4-5.
Voila! Enjoy!
Please note that as a default Inside Explorer Exhibition Viewer will autostart when Windows starts.
There are two ways to remove Inside Explorer from autostart:
Select the Start button, then select Settings > Apps > Startup. Click the button next to Inside Explorer to turn the autostart off.
If you don’t see the Startup option in Settings, right-click the Start button, select Task Manager, then select the Startup tab. (If you don’t see the Startup tab, select More details.) Select Inside Explorer, then select disable to turn off the autostart.
Troubleshooting. Inside Explorer Software not installing properly?
1. Older versions of windows (7, 8, 8.1, early 10) can not use installers. If you are using an old version of windows, we can distribute your content as a zip-folder that is unzipped onto the system. This has several drawbacks and we recommend updating the Windows system.
2. An older version of Inside Explorer is in conflict with the new installer. Go ahead and uninstall all programs that start with Interspectral or Inside Explorer. Restart the computer and try to install IE again.
Share this article